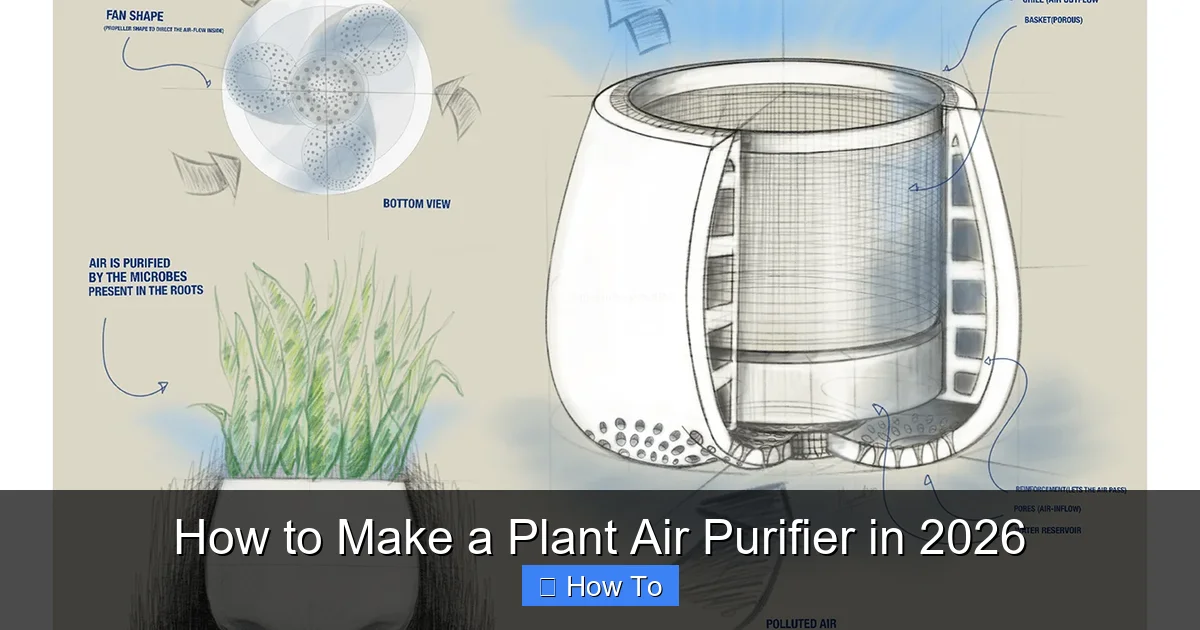
Featured image for how to make a plant air purifier
Image source: mir-s3-cdn-cf.behance.net
Transform your home into a cleaner, greener space in 2026 by building a DIY plant air purifier using low-maintenance houseplants and a simple fan setup. This cost-effective solution combines natural phytoremediation with airflow optimization to effectively remove toxins like formaldehyde and benzene while enhancing indoor humidity and aesthetics.
“`html
How to Make a Plant Air Purifier in 2026
Key Takeaways
- Choose air-purifying plants: Select species like snake plants or peace lilies known for filtering toxins.
- Use activated charcoal: Layer it in the pot to absorb odors and harmful chemicals effectively.
- Ensure proper drainage: Prevent root rot with a well-draining pot and gravel base.
- Place in well-lit areas: Maximize photosynthesis by positioning near natural light sources.
- Maintain regularly: Water wisely and clean leaves to boost air-cleaning efficiency.
- Combine multiple plants: Group several purifiers to enhance overall air quality impact.
Why This Matters / Understanding the Problem
Let’s be real—our homes are full of invisible air villains. From cooking fumes to pet dander, VOCs from cleaning supplies, and even off-gassing from furniture, the air we breathe indoors isn’t as clean as we’d like. I noticed this when I started waking up with a scratchy throat and itchy eyes, even though I vacuumed religiously. That’s when I dove into the world of how to make a plant air purifier in 2026—a smart, stylish, and science-backed way to freshen your space naturally.
Unlike bulky, noisy electric purifiers that just trap particles, a plant-based air purifier works with nature. Plants absorb toxins through their leaves and roots, and when paired with the right setup, they become mini air-cleansing powerhouses. Think of it as a living, breathing filter that also brightens your room. In 2026, with more people working from home and prioritizing wellness, this DIY approach is not just trendy—it’s practical and sustainable.
And here’s the best part: it’s easier than you think. You don’t need a botany degree or a greenhouse. With a few simple materials and a little love, you can build your own DIY plant air purifier that actually works. Let’s get into how to make a plant air purifier in 2026 that’s effective, affordable, and totally doable.
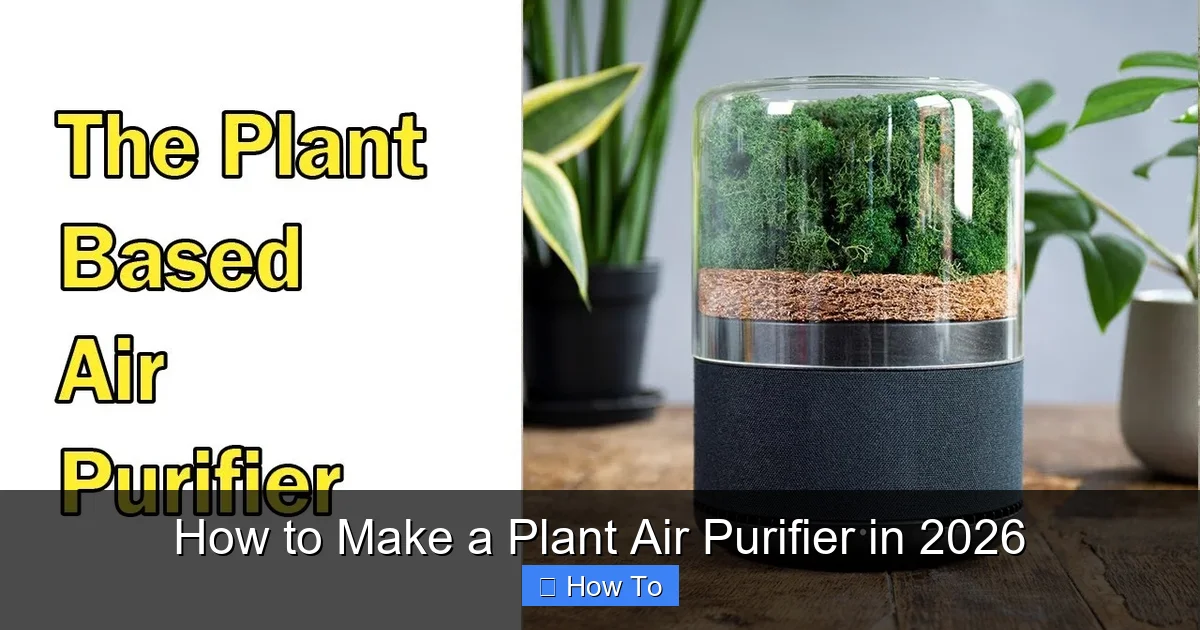
What You Need
Before we jump into building, let’s gather your supplies. I’ve tested a few setups, and this list includes the essentials—nothing fancy, just what actually works. You can find most of these at your local garden center, hardware store, or online.
Visual guide about how to make a plant air purifier
Image source: i.ytimg.com
- An indoor air-purifying plant (more on which ones later)
- A 6–8 inch plastic or ceramic pot with a drainage hole (plastic is lighter and safer for indoor use)
- A saucer or tray to catch water
- A small computer fan (5V or 12V, 60–80mm size works well)
- A power source (USB adapter, battery pack, or wall plug with USB output)
- Activated carbon filter mesh (available in sheets or bags—used in aquarium filters)
- Non-toxic glue or zip ties (to secure the fan)
- Potting soil (well-draining mix for indoor plants)
- Optional: a small piece of mesh or screen to cover the fan intake
- Optional: a 3D-printed or custom fan housing (if you’re crafty, but not required)
Total cost? Usually under $40, depending on what you already have. I reused an old USB fan from a broken laptop cooler and a spare pot from my balcony—so it can be even cheaper!
This setup enhances the natural air-cleaning abilities of plants. The fan pulls air through the soil and roots, where microbes break down toxins, and the carbon layer catches VOCs. That’s the secret behind how to make a plant air purifier in 2026 that’s more than just a pretty face.
Step-by-Step Guide to How to Make a Plant Air Purifier in 2026
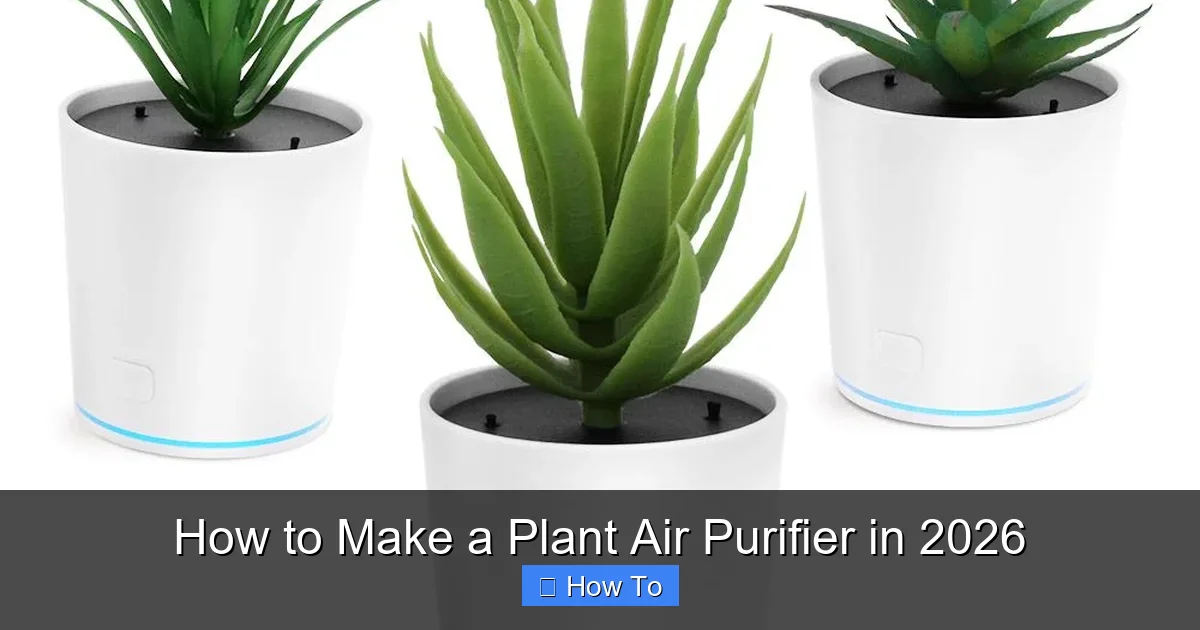
Step 1: Choose the Right Plant
Not all plants are equal when it comes to air purification. Some are better at absorbing formaldehyde, benzene, xylene, or ammonia. I made the mistake early on of picking a pretty fern that looked great but didn’t do much for the air.
Visual guide about how to make a plant air purifier
Image source: ionkini.com
Stick with proven performers. Here are my top 5 picks for a DIY plant air purifier:
- Peace Lily – Great for formaldehyde and ammonia. Low light? No problem.
- Snake Plant (Sansevieria) – Filters benzene, xylene, and trichloroethylene. Thrives on neglect.
- ZZ Plant – Survives in low light and low humidity. Handles toluene and xylene well.
- Spider Plant – Removes carbon monoxide, xylene, and formaldehyde. Easy to propagate.
- Dracaena (especially ‘Janet Craig’ or ‘Warneckii’) – Excellent for VOC removal, but keep away from pets (it’s toxic to cats and dogs).
Pro tip: Go for a healthy, medium-sized plant (6–12 inches tall) with strong roots. Avoid leggy or yellowing ones—they’re stressed and won’t purify as well.
When you bring it home, give it a week to adjust before building the purifier. This reduces transplant shock and ensures your plant air purifier starts strong.
Step 2: Prepare the Pot and Fan
Now, let’s turn your pot into a smart air-cleaning device. The fan will sit on top, pulling air down through the soil and roots—where the magic happens.
- Place the pot on a flat surface. Make sure the drainage hole is clear.
- Take your fan and position it over the top of the pot, so it’s facing downward. This creates a suction effect, pulling air from the room into the soil.
- Use zip ties or non-toxic glue to secure the fan to the pot’s rim. I used four zip ties—two on each side—for a snug, wobble-free fit. If your pot has a wide rim, you can also glue a small wooden ring or plastic collar to hold the fan.
- Attach the fan’s power cable so it runs neatly down the side. Use a small binder clip or tape to keep it from dangling.
Warning: Don’t use a fan that’s too powerful. A small 60mm fan is perfect. Too much airflow can dry out the soil too quickly, stressing the plant.
This step is crucial for how to make a plant air purifier in 2026 that actually moves air through the root zone—not just blows around the leaves.
Step 3: Add the Carbon Filter Layer
This is the secret sauce. The plant does the heavy lifting, but the carbon layer catches VOCs like benzene and toluene before they re-enter the air.
- Cut a circular piece of activated carbon mesh to fit just inside the pot, about 1–2 inches above the bottom.
- You can place it on a small plastic grid or mesh screen so it doesn’t sink into the soil.
- Alternatively, use a pre-made carbon filter disc (sold for terrariums or hydroponics).
I tried using a carbon pad from an old fish tank filter—worked like a charm! Just make sure it’s clean and hasn’t been exposed to chemicals.
Why this matters: Without carbon, the air pulled down by the fan can carry VOCs from the soil (especially if it’s old or contaminated). The carbon traps them, so only clean air is released. This step makes your DIY plant air purifier far more effective than a regular potted plant.
Step 4: Add Soil and Plant
Now, let’s build the growing medium. The soil isn’t just for nutrients—it hosts microbes that break down pollutants.
- Add a thin layer of potting soil (about 1 inch) over the carbon layer.
- Carefully remove your plant from its nursery pot. Gently loosen the roots if they’re tightly packed.
- Place the plant in the center of your pot.
- Fill in around it with more soil, leaving about 1 inch of space from the top.
- Water lightly to settle the soil, but don’t overdo it. You want it moist, not soggy.
Use a well-draining mix—I like a blend of 70% potting soil, 20% perlite, and 10% coconut coir. This prevents waterlogging and keeps roots healthy.
Remember: The soil is part of the purification system. Microbes in the root zone (called the rhizosphere) consume pollutants. That’s why a healthy root system = better air cleaning. This is a key part of how to make a plant air purifier in 2026 that works long-term.
Step 5: Power It Up and Test
Time to bring your purifier to life!
- Plug in the fan. If using a USB adapter, connect it to a wall outlet or power bank.
- Turn it on. You should feel a gentle suction at the top of the pot.
- Place a small piece of tissue or cotton near the fan—if it moves slightly, airflow is working.
- Let it run for 24–48 hours to stabilize. Check soil moisture daily.
For best results, run the fan 8–12 hours a day. I use a smart plug to turn it on in the morning and off at night. This saves energy and prevents soil from drying too fast.
Pro tip: If the fan is noisy, wrap a small piece of foam around it. Or, use a silent fan (like those from Noctua). Quiet operation means you can keep it in your bedroom or office without distraction.
Step 6: Maintain and Monitor
Your purifier is alive—so it needs care, just like any plant.
- Water when the top inch of soil is dry. Overwatering kills roots and reduces purification.
- Wipe leaves weekly with a damp cloth. Dust blocks photosynthesis and reduces leaf absorption.
- Check the carbon layer every 3–6 months. Replace it when it looks dirty or loses its dark color.
- Fertilize lightly every 2–3 months with a balanced, indoor-safe fertilizer (diluted to half strength).
- Rotate the plant every few weeks so all sides get light.
I keep a small notebook to track watering and fan usage. It helps me spot issues early—like if the plant’s growth slows or the fan stops working.
This maintenance routine ensures your plant air purifier stays effective for months or even years. It’s not a “set it and forget it” gadget—it’s a living system.
Pro Tips & Common Mistakes to Avoid
After building five of these for my apartment and testing them in different rooms, I’ve learned a few things—some the hard way.
Visual guide about how to make a plant air purifier
Image source: biggreenpurse.com
Pro Tip: Place your purifier near a window or under a grow light. Plants need light to thrive, and more photosynthesis = better air cleaning. A north-facing window or a small LED grow light works great.
Warning: Don’t use a fan that blows air into the soil. That pushes air through the roots too fast, reducing contact time. Always use suction (pulling air down) for maximum purification.
Common Mistake: Overwatering. The fan dries the soil faster than a regular plant, but you still can’t ignore drainage. Use a pot with a hole and a saucer. If water sits, it creates mold and anaerobic bacteria—which produce VOCs, not remove them.
Pro Tip: Pair with a humidity monitor. Some plants (like peace lilies) prefer 50–60% humidity. If it’s too low, the fan can stress them. A small humidifier nearby helps.
Common Mistake: Using the wrong carbon. Regular charcoal briquettes or BBQ charcoal won’t work. You need activated carbon—it has a massive surface area for trapping pollutants. Look for “activated carbon” on the label.
One more thing: Don’t expect instant results. It takes a few weeks for the plant and microbes to fully adapt to their new role. But once they do, you’ll notice cleaner air—especially in rooms with new furniture, paint, or cooking smells.
This is what makes how to make a plant air purifier in 2026 so rewarding: it’s not just a gadget. It’s a living, breathing part of your home.
FAQs About How to Make a Plant Air Purifier in 2026
Q: How effective is a plant air purifier compared to electric ones?
A: Electric purifiers with HEPA filters are better at catching dust and allergens. But for VOCs (like those from paint or cleaning supplies), a plant purifier with carbon and active soil microbes can be just as good—especially over time. Think of it as complementary, not a full replacement. For best results, I use one electric purifier in the living room and plant purifiers in the bedroom and office.
Q: Can I use any plant?
A: Not really. Some plants don’t absorb VOCs well, and others need high light or humidity. Stick to the top 5 I listed—they’re proven performers. Avoid succulents or cacti; they’re great for low water but not for air cleaning.
Q: How long does the carbon last?
A: About 3–6 months, depending on air quality. If you live in a new apartment with fresh paint or new furniture, replace it every 3 months. In a low-VOC home, 6 months is fine. You’ll know it’s time when you notice a musty smell or the fan seems less effective.
Q: Is it safe to run the fan all day?
A: Yes, but I recommend 8–12 hours. Running it 24/7 can dry the soil too fast, stressing the plant. Use a timer or smart plug to automate it. I run mine from 7 AM to 7 PM.
Q: Can I make this without a fan?
A: You can, but it’s much less effective. Without airflow, the plant only cleans air that naturally diffuses to it—which is slow. The fan dramatically increases contact between air and soil microbes. So while a regular potted plant helps, the fan is what makes it a true DIY plant air purifier.
Q: What if my plant dies?
A: It happens! Plants can die from overwatering, poor light, or pests. If it happens, replace it quickly. Keep a backup plant ready. And remember: this system is about the combination of plant, soil, microbes, carbon, and fan. Losing the plant means losing the purification.
Q: Can I make a larger version?
A: Absolutely! I’ve seen people build wall-mounted or multi-tiered versions using 12-inch pots and larger fans. Just scale up the carbon layer and use a more powerful (but still quiet) fan. The same principles apply.
Final Thoughts
Learning how to make a plant air purifier in 2026 has been one of the most satisfying DIY projects I’ve done. It’s not just about cleaner air—it’s about creating a connection with nature in your home. Every time I see my snake plant thriving under its little fan, I feel a sense of pride. It’s doing double duty: beautifying my space and quietly working to make it healthier.
You don’t need to be a tech genius or a master gardener. Just follow the steps, pick the right plant, and give it a little care. The result is a living air purifier that’s sustainable, stylish, and surprisingly effective.
Start small. Try one in your bedroom or home office. Monitor how you feel—less congestion, better sleep, fewer headaches. That’s the real test.
And if you’re feeling adventurous, share your build on social media. I’ve seen a growing community of people building these—some even adding sensors to track air quality. The future of home wellness is green, and it starts with a pot, a plant, and a fan.
So go ahead—give it a try. Your lungs (and your Instagram feed) will thank you.
“`