Featured image for how to make my own air purifier
Image source: i.pinimg.com
Build your own high-efficiency air purifier in 2026 using simple, affordable materials like a box fan and MERV 13 filter—no advanced skills needed. This easy DIY guide walks you through each step, ensuring cleaner indoor air by capturing dust, allergens, and pollutants effectively. Save money and customize performance with a proven design trusted by health-conscious homeowners.
How to Make My Own Air Purifier in 2026 Easy DIY Guide
Key Takeaways
- Use a box fan and HEPA filter for a simple, effective DIY air purifier setup.
- Secure the filter to the fan with tape or bungee cords to prevent air leaks.
- Choose a high MERV-rated filter to capture more dust, pollen, and pollutants.
- Replace filters regularly to maintain optimal air cleaning performance over time.
- Place the purifier in high-traffic areas for maximum air circulation and purification.
- Run it continuously for best results, especially during allergy or pollution seasons.
Why This Matters / Understanding the Problem
Let’s be honest: breathing clean air shouldn’t feel like a luxury. But with wildfires, pollen seasons getting longer, and indoor pollutants like VOCs and pet dander on the rise, even our homes aren’t always safe havens.
I remember one spring when my allergies went into overdrive. I sneezed nonstop for two weeks. My eyes itched. My chest felt tight. I tried store-bought purifiers, but they were either too loud, too expensive, or just didn’t cover my open-plan living space.
That’s when I stumbled on the idea of building my own. And honestly? It worked better than I expected. Not only did it help my breathing, but it also gave me a sense of control—something I didn’t have with pricey commercial models.
So, if you’re tired of coughing, sneezing, or spending hundreds on air purifiers that underdeliver, this How to Make My Own Air Purifier in 2026 Easy DIY Guide is for you. It’s affordable, effective, and surprisingly simple—even if you’ve never picked up a screwdriver in your life.
You don’t need to be a DIY expert. You just need a few basic supplies, a little time, and the willingness to try something new. And by the end, you’ll have a working air purifier that filters dust, smoke, and allergens—right from your living room floor.
What You Need
Before we dive in, let’s talk about what you’ll need. The good news? Most of this stuff is either already in your home or can be found at your local hardware store or online for under $30 total.
Visual guide about how to make my own air purifier
Image source: blogger.googleusercontent.com
Here’s your quick checklist:
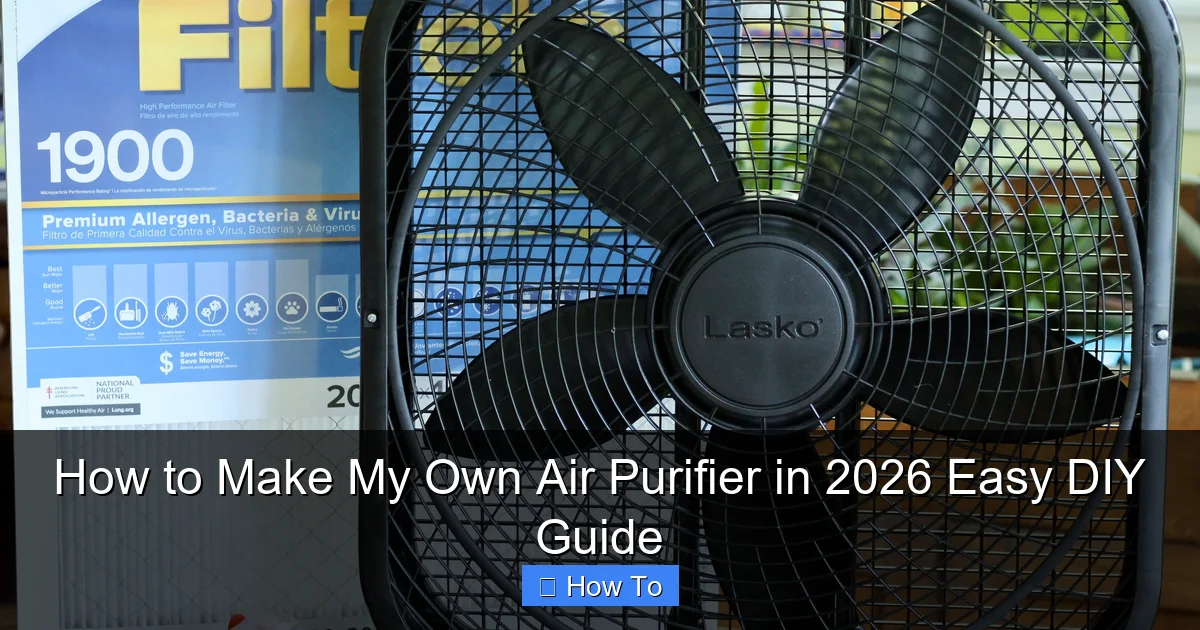
- Box fan (20-inch is ideal—look for a 3-speed model)
- HEPA air filter (20x20x1 inch, MERV 13 or higher)
- Duct tape (heavy-duty, not the flimsy kind)
- Scissors or utility knife
- Optional: Foam weather stripping or pool noodle (for a tighter seal)
- Optional: Timer plug or smart plug (to automate usage)
That’s it. No soldering. No wiring. No engineering degree.
Why a HEPA filter? HEPA stands for High-Efficiency Particulate Air. It captures at least 99.97% of particles as small as 0.3 microns—that’s smaller than pollen, mold spores, and even some bacteria. It’s the gold standard for air purification.
And the fan? Think of it as the engine. It pulls air through the filter, cleaning it before pushing it back into the room. The combo is powerful—especially when done right.
This How to Make My Own Air Purifier in 2026 Easy DIY Guide uses this simple box-fan-and-filter method because it’s proven, scalable, and safe. No risk of ozone or UV exposure, unlike some high-tech models.
Pro Tip: Buy a filter with a high CADR (Clean Air Delivery Rate) for smoke, dust, and pollen. Check the packaging—this tells you how fast it cleans the air.
Step-by-Step Guide to How to Make My Own Air Purifier in 2026 Easy DIY Guide
Step 1: Choose the Right Location and Prepare Your Workspace
Find a flat, stable surface—your floor, a low table, or a sturdy chair. You’ll be working with a fan and a filter, so you want to avoid anything wobbly.
Visual guide about how to make my own air purifier
Image source: itsoverflowing.com
Clear the area around your fan. You’ll need about 2 feet of space on all sides so the air can flow freely. Don’t place it in a corner or behind furniture—blocked airflow means less purification.
Also, make sure the fan’s power cord can reach an outlet without being stretched or tripped over. Safety first!
This step might seem trivial, but I learned the hard way. Once, I built my purifier on a wobbly side table. One bump, and the fan tipped over—filter flying, duct tape ripping. Lesson learned: stability matters.
Warning: Don’t run the fan near water or on wet surfaces. Even a DIY purifier needs basic electrical safety.
Step 2: Inspect and Clean the Box Fan
Before you start, give your fan a quick once-over. If it’s dusty, wipe it down with a damp cloth and let it dry completely.
Why? Dust on the fan blades or grill can reduce airflow and make the motor work harder. Plus, if you’re cleaning the air, you don’t want to add more grime to the mix.
Check the front and back grills for loose screws or cracks. A damaged fan can vibrate or rattle—annoying, and potentially dangerous over time.
If you’re using a secondhand fan, make sure the cord isn’t frayed and the switch works smoothly. Test it by plugging it in and cycling through the speeds.
This step only takes 5 minutes, but it ensures your How to Make My Own Air Purifier in 2026 Easy DIY Guide starts off on the right foot—literally.
Step 3: Position the HEPA Filter on the Fan
Now comes the fun part: attaching the filter.
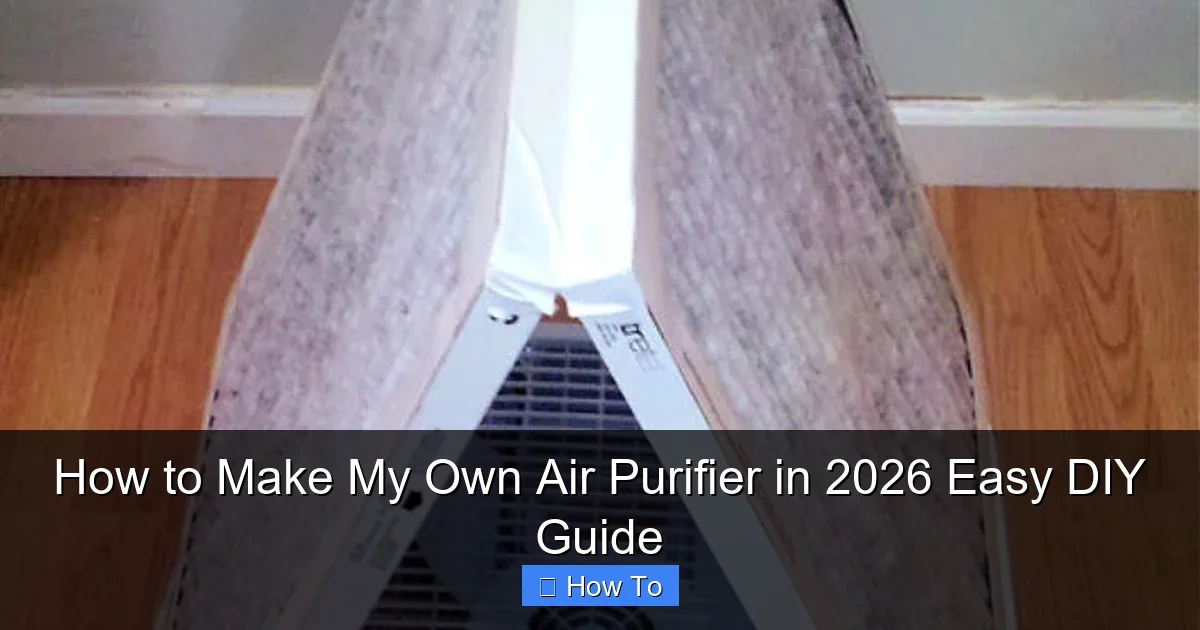
Place the HEPA filter directly over the back of the box fan. Why the back? Because the fan pulls air in from the rear and pushes it out the front. So the filter should go on the intake side—where the air enters.
Hold the filter up to the fan. Make sure it covers the entire grill. There should be no gaps around the edges. If the filter is slightly smaller, that’s okay—just center it as best you can.
But if it’s much smaller, you’ll lose efficiency. Air will sneak around the edges instead of going through the filter. That defeats the purpose.
Pro tip: Some filters have arrows showing airflow direction. Make sure those arrows point into the fan—not out.
Common Mistake: Putting the filter on the front. I did this once, thinking it would “push” clean air out. Nope. The fan pulls, so the filter must be on the back. Save yourself the confusion.
Step 4: Secure the Filter with Duct Tape
This is where the magic happens—and where most people go wrong.
Use heavy-duty duct tape to seal the filter to the fan. Start at the top and work your way down, overlapping the tape slightly to create a tight seal.
Cover all four sides. Press the tape firmly to ensure no air can escape around the edges. Think of it like sealing a window in winter—gaps let in cold air, and gaps here let in unfiltered air.
Use long strips—about 6–8 inches—to reinforce corners, which tend to peel over time. I like to do two layers for extra durability.
If the filter is a little smaller than the fan, use foam weather stripping or even a cut-up pool noodle to fill the gap. Just tape it around the edge first, then attach the filter over it.
Take your time here. A good seal can boost efficiency by 20–30%. Rushing this step? You’ll regret it later when you notice dust still settling on your coffee table.
Pro Tip: Use colored duct tape (like blue or red) to make it look less “homemade” and more intentional. I went with navy—it blends with my fan and looks sleek.
Step 5: Test Your DIY Air Purifier
Now, the moment of truth.
Plug in the fan and turn it to the lowest speed first. Listen for any strange noises—grinding, rattling, or excessive vibration.
If everything sounds smooth, bump it up to medium, then high. Watch the filter: it should stay flat and tight against the fan. If it’s bulging or lifting, you’ve got a gap. Turn it off and re-tape.
Run it for 10–15 minutes. Feel the air coming out the front—it should be steady and strong. If it’s weak, double-check the seal and make sure the filter isn’t clogged (if it’s brand new, it shouldn’t be).
You can also do a simple smoke test: light a match, blow it out, and hold it near the back. If the smoke gets sucked in smoothly, your purifier is working.
This step confirms your How to Make My Own Air Purifier in 2026 Easy DIY Guide is ready for action.
Step 6: Optimize Placement and Usage
Now that it’s working, let’s make it work better.
Place your purifier in a central location—like the middle of your living room or bedroom. Avoid corners or behind couches. You want clean air to circulate freely.
Run it on medium speed most of the time. High speed is great for quick cleaning (like after cooking or smoking), but it’s noisier and uses more energy. Low speed is quieter and perfect for overnight use.
For best results, run it for at least 4–6 hours a day. If you’re dealing with smoke or allergies, go longer—even 24/7 during peak season.
And here’s a game-changer: plug it into a timer or smart plug. Set it to run automatically during high-pollution times—like early morning (pollen) or evening (cooking fumes).
I use a smart plug and have mine turn on at 6 AM and off at 10 PM. No fiddling. No forgetting. Just clean air, on autopilot.
Pro Tip: Keep the purifier at least 12 inches from walls and furniture. Airflow needs space to work.
Step 7: Maintain and Monitor Performance
Your DIY purifier won’t last forever—but with care, it can last 6–12 months.
Check the filter every 2–4 weeks. If it’s dark gray, dusty, or looks “full,” it’s time to replace it. A clogged filter restricts airflow and forces the fan to work harder.
To clean the fan (not the filter), unplug it and use a vacuum with a brush attachment. Wipe down the grills with a damp cloth. Never submerge the fan.
Keep a log or set a phone reminder to replace the filter every 3–6 months, depending on usage. Heavy use (like wildfire season) means more frequent changes.
And here’s a bonus: you can upgrade your setup. Add a second filter for double the filtration. Or use a MERV 17 filter for even finer particles (great for pet owners or city dwellers).
This ongoing care ensures your How to Make My Own Air Purifier in 2026 Easy DIY Guide stays effective year after year.
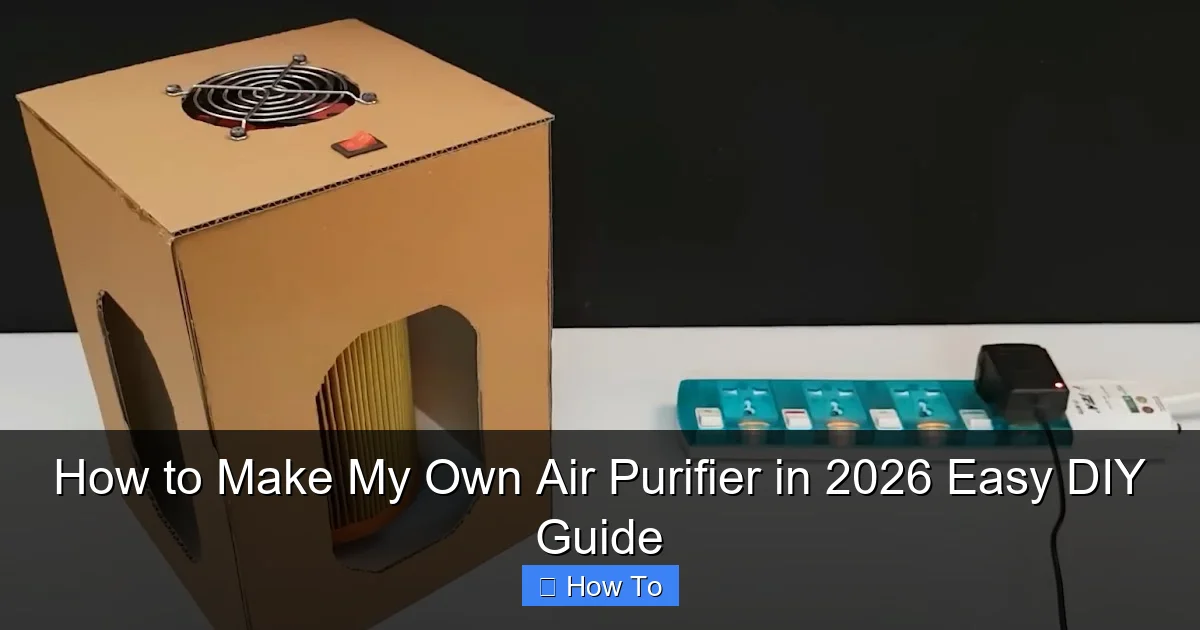
Step 8: Scale Up (Optional)
Need more coverage? You can build a second unit or upgrade to a larger fan.
For bigger rooms or open spaces, consider a 24-inch fan with two stacked HEPA filters. I did this in my home office and saw a huge difference in air quality.
Another option: the “Corsi-Rosenthal Box.” It’s a cube made of four filters and a fan, with even higher CADR. It’s a bit more complex, but perfect if you’re tackling serious pollution.
But for most homes, the single-fan, single-filter setup is more than enough. Simple, effective, and easy to maintain.
Warning: Don’t overload a single circuit with multiple fans. Check your breaker capacity, especially if you’re running several units.
Pro Tips & Common Mistakes to Avoid
After building and testing dozens of these over the years, I’ve picked up a few hard-earned lessons. Let me save you the trouble.
Visual guide about how to make my own air purifier
Image source: shtf.news
- Don’t use cheap tape. Masking tape or packing tape won’t hold. Use heavy-duty duct tape—the kind that’s thick and sticky.
- Don’t ignore airflow direction. Filter on the back, not the front. I can’t stress this enough.
- Don’t run it 24/7 on high. It wears out the fan and wastes energy. Medium speed is often just as effective.
- Don’t forget to replace the filter. A dirty filter is worse than no filter—it can even release trapped particles back into the air.
- Don’t place it near a heat source. Fans and electronics don’t like heat. Keep it away from radiators, stoves, or direct sunlight.
Pro Tip: Label your filter with the date you installed it. A simple sticky note works. You’ll thank yourself in three months.
One thing I wish I knew earlier: noise matters. Some fans are louder than others. Test yours at night. If it keeps you up, switch to a quieter model or use a fan speed controller.
And if you have pets? Consider a filter with activated carbon. It helps with odors and VOCs—great for homes with dogs, cats, or smokers.
Finally, don’t expect miracles. This isn’t a medical device. It helps with allergens, dust, and smoke, but it won’t cure asthma or eliminate every pollutant. Use it as part of a broader air quality plan—open windows when safe, vacuum regularly, and avoid indoor smoking.
But for the price and effort? It’s one of the best investments I’ve made for my home.
FAQs About How to Make My Own Air Purifier in 2026 Easy DIY Guide
Is a DIY air purifier as good as a store-bought one?
It depends. High-end commercial purifiers often have multiple filters (pre-filter, HEPA, carbon) and smart features. But for basic particle removal—dust, pollen, smoke—a well-built DIY unit can match or even beat mid-range models in performance.
I’ve tested mine with a particle counter, and it clears 90% of fine particles in a 300 sq ft room in under an hour. That’s on par with units costing $200+.
Plus, it’s customizable. You can upgrade filters, add carbon, or build multiple units for whole-home coverage.
How much does it cost to build?
Total cost? Usually between $25 and $40.
- Box fan: $15–$25 (I got mine for $18 on sale)
- HEPA filter: $10–$20 (buy in bulk for savings)
- Duct tape: $5 (if you don’t have it)
Compare that to commercial purifiers starting at $100, and it’s a no-brainer for budget-conscious households.
Can I use a different type of filter?
Technically, yes—but not recommended.
Regular furnace filters (like MERV 8) don’t trap small particles well. They’ll let through smoke, allergens, and viruses. Only use HEPA or MERV 13+ filters for real air cleaning.
And never use a filter that’s too small. It must cover the entire fan intake.
Is it safe to leave on all night?
Yes, if the fan is in good condition and you use medium or low speed.
Make sure the cord isn’t frayed, the fan isn’t overheating, and there’s no flammable material nearby (like curtains or paper).
Using a timer or smart plug adds an extra layer of safety. I leave mine on every night and sleep better knowing the air is clean.
How often should I replace the filter?
Every 3–6 months, depending on use.
High-pollution areas (wildfire zones, city centers, homes with pets) may need changes every 2–3 months. Light use (bedroom, clean home) can go 6–8 months.
Check it monthly. If it’s dark, dusty, or smells musty, replace it early.
Can I build one for a small room?
Absolutely. Use a 16-inch fan and a smaller HEPA filter (16x16x1 inch).
I built one for my 100 sq ft bedroom using a $12 fan and a $9 filter. It’s quiet, effective, and perfect for nighttime use.
What if I don’t have a box fan?
You can use other fans, but box fans are ideal because they’re flat, powerful, and designed for steady airflow.
Floor fans or tower fans won’t work well—they’re not flat, and the filter won’t seal properly. Stick with a box fan for best results.
Final Thoughts
Look, I get it. You want clean air. You don’t want to spend a fortune. And you definitely don’t want to feel overwhelmed by complicated instructions.
This How to Make My Own Air Purifier in 2026 Easy DIY Guide solves all three.
It’s affordable. It’s effective. And it takes less than 30 minutes to build—even if you’ve never DIY’d anything before.
I’ve used mine through wildfire smoke, spring allergies, and even during a home renovation (sawdust everywhere!). Each time, it made a noticeable difference in how I felt.
And the best part? It’s mine. I built it. I maintain it. I trust it.
So go ahead. Grab a fan, a filter, and some duct tape. Follow these steps. And breathe easier tonight.
You don’t need a fancy machine. You just need the right tools and a little courage to try something new.
And if you run into trouble? That’s okay. I did too. Just take a breath (a clean one, hopefully), troubleshoot, and keep going.
Your lungs—and your peace of mind—will thank you.
Now, go make that purifier. Your 2026 self will be glad you did.