Featured image for how to make your own air purifier
Image source: arc.stimg.co
Build your own air purifier in 2026 with simple, affordable materials like a box fan and HEPA filter for cleaner, healthier indoor air. This DIY solution offers a cost-effective alternative to commercial units, effectively capturing dust, pollen, and pollutants while giving you full control over performance and maintenance. Easy to assemble and eco-friendly, homemade air purifiers are a smart, sustainable choice for modern homes.
“`html
How to Make Your Own Air Purifier in 2026
Key Takeaways
- Choose a high-quality fan: Opt for energy-efficient, quiet models for optimal airflow.
- Use MERV 13+ filters: Capture fine particles and allergens effectively.
- Seal connections tightly: Prevent air leaks to maximize purification efficiency.
- Maintain regular cleaning: Replace filters every 3-6 months for best results.
- Size matters: Match your purifier to room dimensions for full coverage.
- Add activated carbon: Reduce odors and VOCs with a secondary filter layer.
Why This Matters / Understanding the Problem
Let’s be real—air quality isn’t getting better. Between wildfire smoke, pollen seasons that feel like they never end, and indoor pollutants from cleaning products or cooking fumes, breathing clean air at home has become a luxury. I remember last summer when my allergies were so bad I couldn’t sleep. My eyes were itchy, my nose was constantly running, and even my usual HEPA filter wasn’t cutting it.
That’s when I started wondering: *What if I could build something myself?* Not because I’m an engineer or a DIY wizard—just because I wanted cleaner air without dropping $300 on a fancy purifier. Turns out, making your own air purifier in 2026 is not only possible but surprisingly effective—and affordable.
Whether you’re dealing with pet dander, urban smog, or just want peace of mind knowing your indoor air isn’t full of invisible nasties, learning how to make your own air purifier in 2026 gives you control. You don’t need a lab coat or a degree in environmental science. All you need is a little curiosity, some basic tools, and this guide.
What You Need
Before we dive into the build, let’s talk about what you’ll need. The beauty of this project is that most parts are easy to find and won’t break the bank. Here’s your shopping list:
- A high-quality box fan (12–20 inches works best—look for one with at least 3 speeds)
- HVAC air filters (MERV 13 or higher is ideal for trapping fine particles like smoke and allergens)
- Zip ties or duct tape (to secure the filter to the fan—zip ties are cleaner and reusable)
- Measuring tape (to ensure a snug fit)
- Scissors or utility knife (for trimming if needed)
Optional but helpful:
- A second filter (for double-layer filtration)
- Weather stripping or foam tape (to reduce air leaks around the edges)
- A timer plug (so you can automate runtime and save energy)
You can grab everything at your local hardware store, home improvement center, or online. Total cost? Usually under $50—way less than most commercial units. And unlike store-bought purifiers, you know exactly what’s inside: no hidden plastics, no proprietary filters you have to keep buying.
Step-by-Step Guide to How to Make Your Own Air Purifier in 2026
Now for the fun part—building your DIY air purifier. This method, often called a “Corsi-Rosenthal box” (named after the researchers who popularized it), uses simple physics: pull air through a high-grade filter using a fan. It’s effective, energy-efficient, and surprisingly quiet once assembled properly.
Step 1: Choose the Right Filter
Not all air filters are created equal. For this project, you want a **MERV 13** or higher pleated HVAC filter. Why? Because lower-rated filters (like MERV 8) won’t catch fine particles like PM2.5 (that’s the stuff from wildfires and vehicle exhaust). MERV 13 filters trap over 90% of particles between 1–3 microns—including mold spores, dust mites, and even some bacteria.
I learned this the hard way. My first attempt used a cheap fiberglass filter I had lying around. It looked fine, but after a week, my allergy symptoms hadn’t improved at all. Switched to a Filtrete MERV 13, and within two days, I noticed a difference.
Pro tip: Check the filter size. Most box fans are 20×20 inches, but measure yours to be sure. You can always trim a slightly larger filter with scissors—just avoid cutting into the pleats.
Step 2: Prep Your Fan
Turn your box fan upside down so the back (the side with the motor and controls) is facing up. This is where the air gets pulled in. You want the filter to cover the entire intake area—no gaps!
If your fan has a grille or mesh guard, leave it on. It protects the motor and helps distribute airflow evenly across the filter. Don’t remove it unless it’s blocking the filter from lying flat.
Now, place the filter over the back of the fan. Make sure the airflow arrow on the filter frame points *toward* the fan. This seems obvious, but I’ve seen people install filters backward—and that defeats the whole purpose. The arrow shows which direction air should flow through the filter media.
Step 3: Secure the Filter
This is where zip ties shine. Wrap them around the fan frame and through the corners of the filter. Use at least four—one per corner—and tighten them just enough to hold the filter snugly without warping it.
If you don’t have zip ties, heavy-duty duct tape works in a pinch. But be careful: tape can leave sticky residue and isn’t reusable. Plus, if the seal isn’t tight, unfiltered air will sneak around the edges—which means your DIY purifier becomes less effective.
For an even tighter seal, add a thin strip of weather stripping or foam tape along the edge where the filter meets the fan. This minimizes bypass airflow and boosts efficiency by up to 20%, according to some university studies.
Step 4: Test and Position
Plug it in and turn it on to the lowest setting first. Listen for unusual noises—if the filter is vibrating or flapping, tighten the zip ties. Once it’s running smoothly, crank it up.
Now, placement matters. Don’t stick your homemade air purifier in a corner or behind furniture. Air needs to circulate freely. I keep mine in the center of my living room, about 3 feet off the ground. In bedrooms, I place it near the bed but not so close that the breeze disturbs sleep.
Also, avoid placing it directly next to walls or curtains—these can block intake. Aim for at least 6–12 inches of clearance on all sides.
Step 5: Maintain Regularly
Your DIY air purifier won’t last forever. Filters get clogged over time, reducing airflow and efficiency. How often you replace it depends on your environment:
- In dusty homes or during wildfire season: every 2–3 months
- In cleaner environments: every 4–6 months
A good rule of thumb: if the fan sounds louder or airflow feels weaker, it’s time for a new filter. You can also check visually—if the filter looks gray or dirty, swap it out.
Don’t forget to wipe down the fan blades and exterior every few weeks with a damp cloth. Dust buildup can reduce performance and even become a source of contamination.
Pro Tips & Common Mistakes to Avoid
Having built and tested several versions over the past year, here are the lessons I wish I’d known from day one:
Pro Tip: Use two filters for extra protection. Stack them with the airflow arrows pointing the same way. This doubles your filtration power without needing a bigger fan—perfect for high-pollution days.
Warning: Don’t use ozone-generating “ionizers” or UV lights unless you really know what you’re doing. Many DIY kits online include these, but they can produce harmful byproducts. Stick to mechanical filtration—it’s safer and proven.
One common mistake? Overestimating coverage. A single 20-inch fan-filter combo won’t purify your entire 2,000-square-foot house. It’s best for one room—typically up to 300–400 square feet. If you have an open floor plan, consider building two units and placing them on opposite sides.
Another pitfall: using the wrong fan speed. On high, it’s loud and uses more electricity. On low, it’s quiet but may not move enough air. I run mine on medium during the day and low at night. Experiment to find your sweet spot.
And please—don’t skip the MERV rating. I get it, MERV 13 filters cost a bit more. But think of it like buying sunscreen: SPF 15 vs. SPF 50. One offers basic protection; the other actually does the job.
FAQs About How to Make Your Own Air Purifier in 2026
Is a DIY air purifier as effective as a commercial one?
For particle removal—yes, especially against dust, pollen, and smoke. Independent tests show well-built fan-filter combos can match or exceed the performance of many mid-range HEPA purifiers. However, they don’t remove gases or odors like activated carbon filters do. If you need odor control, consider adding a carbon layer (though that’s more advanced).
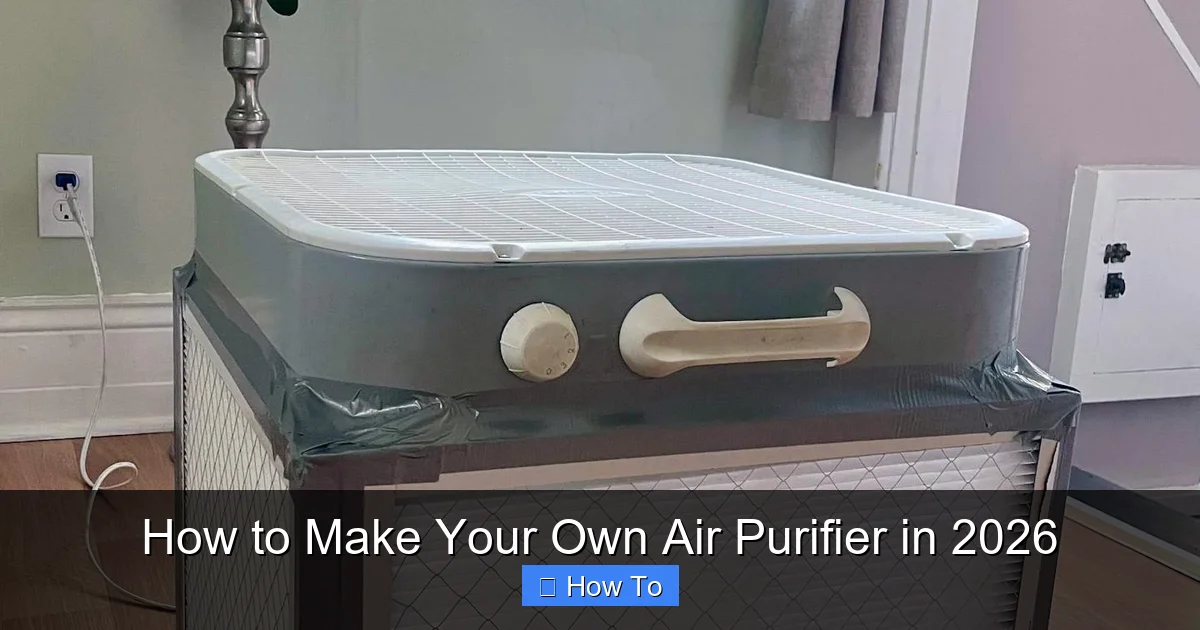
Visual guide about how to make your own air purifier
Image source: bestairpurifiercanada.com

Visual guide about how to make your own air purifier
Image source: i.ytimg.com

Visual guide about how to make your own air purifier
Image source: arc.stimg.co
How much electricity does it use?
A typical box fan uses about 50–100 watts on medium. That’s roughly $5–$10 per month if run 24/7, depending on your electricity rate. Much cheaper than many smart purifiers that use 30–60 watts *plus* standby power.
Can I make a smaller version for my desk or car?
Absolutely! Use a 12-inch fan and a matching filter for a desktop unit. For cars, it’s trickier due to space and power, but some people rig up 12V fans with small filters—just ensure proper ventilation to avoid overheating.
Will it help with COVID or other viruses?
It can reduce airborne virus particles by capturing them in the filter, especially if they’re attached to larger droplets or dust. While not a substitute for vaccination or ventilation, it’s a helpful layer of protection in shared spaces.
Do I need to run it all the time?
Not necessarily. Running it 8–12 hours a day (like during waking hours or while sleeping) makes a big difference. Use a timer plug to automate it—set it to turn on when you’re home and off when you’re away.
What if my filter doesn’t fit perfectly?
Trim it carefully with scissors, but never cut into the pleated material. If there are small gaps, seal them with foam tape. A tight seal ensures all air passes through the filter—not around it.
Can pets be around it?
Yes! In fact, it’s great for pet owners. It captures dander, fur, and even litter dust. Just make sure your pet can’t chew the cords or knock it over. I keep mine on a low bookshelf out of my cat’s reach.
Final Thoughts
Making your own air purifier in 2026 isn’t just a fun weekend project—it’s a practical, empowering way to take charge of your indoor air quality. You don’t need to wait for perfect conditions or rely on expensive gadgets. With a box fan, a good filter, and a few zip ties, you can create a device that genuinely improves how you breathe and feel at home.
I’ll be honest: my first build looked a little janky. But after a few tweaks, it’s become a permanent fixture in my living space. My allergies are better, my room smells fresher, and I sleep more soundly. Plus, there’s something deeply satisfying about knowing exactly how it works—and that I built it myself.
So go ahead. Grab those supplies, follow the steps, and give it a try. Your lungs (and your wallet) will thank you. And if you run into issues? Remember—every expert was once a beginner who just started.
“`